Showing posts with label DIY. Show all posts

Wednesday, April 4, 2012

DIY: Twine Wrapped Bottles

What do you get when you have leftover bottles, twine, and hot glue?


An easy, inexpensive DIY project!


I love how these twine-wrapped jars add texture and something natural to a room. (Side note: whether it be a wood side table, a bamboo place mat or a plant, I believe every room needs something 'from nature' in it.)


One of my favorite parts of design is mixing rustic, rough pieces with delicate items. Opposites attract...look how the pink flowers and twine complement each other :)


Mix it up by wrapping unexpected pieces such as wine glasses, use different colored twine on the jars, or gluing a strip of moss or fabric in between the twine.


What do you think? Have you ever made any?

Friday, March 30, 2012

Easter Eggs- with a Surprise

Look at my pretty little eggs I dyed.  Do they seem extra special to you?


Maybe not from that angle, but now can you see? There are brownies baked inside!!


I used the directions from la receta de la felicidad (scroll down for the English version), but tweaked them to what worked best for me. Here is how I did it...

What you need

1 Brownie recipe or box mix
12 Eggs
Corkscrew bottle opener
Piping bag
Paper towel
Muffin tin with aluminum foil or mini muffin tin
Dye kit or food coloring and vinegar

Directions
  • Dye uncooked eggs. Let dry.  (This is optional: colored eggs are not necessary)
  • Carefully poke a small hole at the bottom of each egg, using a corkscrew bottle opener.
  • Once you have poked a tiny hole, peel back the edges of the hole to expand it a bit. The holes need to be large enough to fit the tip of a piping bag inside.
  • Turn the egg upside-down and dump out the contents. (I saved the innards to use/cook with)
  • Rinse the insides of the eggs out thoroughly under the faucet.
  • Immerse eggs in saltwater for thirty minutes. Eggs need to be filled with the saltwater in order to sink.
  • Rinse the egg shells in cold water and lay the eggs hole side down in the egg carton covered in paper towel.

  • Prepare the brownie batter. I used Betty Crocker's Gluten free mix but you can use another mix or your homemade version.
  • Drizzle about 1 teaspoon of oil in each egg and turn it in your hand until the inside is completely covered. Dump out any excessive oil.
  • Load the batter into a piping bag fitted with a round tip. Make sure that the tip can fit the egg hole. If it can’t, expand the hole a little bit at a time until it fits. Fill your eggs about 1/2 to 2/3 full with batter.

This part gets tricky! If you overfill, the batter comes out of the egg (see below) but if you under fill the egg will crack.  You may want to try a 'test' batch like I did.

  • Place the prepared egg shells into a mini cupcake tin or use aluminum foil in a larger tin to help them stand upright.
  • Bake the eggs at 350ยบ F for 15-20 minutes.


Learn from my mistake below! I obviously overfilled them a bit. Although it looks ugly right after baking,  just remove the excess cake and clean the shell with a damp towel. It is important to do this when the cake is still hot, because if the egg is cold it is almost impossible to get off without the shell breaking. Or you can avoid it all together by not filling up as much :)


After your eggs are done baking, remove them from the oven, let cool, and eat.

I placed 2 to 3 in mini bird nests on each place setting... full tablescape coming up later!

Have a great weekend!

Friday, January 13, 2012

When Life Gives You Lemons... Make a Centerpiece!

I can't complain, this winter has been mild and snow-less...until tonight.  Although I have kind of missed a white winter, I'm not going to say I'm excited about the snow, ice, and horrible roads that are going to plague the next 3 months.

To bring a little color into the house (and to fill in the bare shelves after all the Christmas decor comes down) this easy, DIY centerpiece fits the bill.  


To be honest, the only reason I made it was to use up all the lemons I had before we go on vacation.  How much lemon water can someone drink?!  But really, making centerpieces out of leftover items is practical AND cheap. Oranges, cranberries, limes, and grapes come to mind...oh the possibilities.
To make this centerpiece like I did above, cut small slices in the lemon (discarding the ends)and layer in a rectangular or square vase. Poke a few flowers through the lemons and fill with water to the height of the flower stems.


The fruit doesn't need to be the same size or placed in a perfect row, the natural variance gives it character. 


So instead of throwing out those stale almonds, pour them into a large vase and put a pillar candle in the middle.   Have apples that look good on the outside but are mushy inside? Use them as place card holders!  Did you buy a watermelon that isn't sweet enough to eat? Carve out the innards and use it as a 'dish' to serve fruit.

What do you have in your house that is just waiting to be turned into a centerpiece or decor item?

Monday, October 24, 2011

Day 26 of 31 Day Spooktacular- Treat Bag Toppers


Giving away candy and homemade goods is one of the (many) fun parts of the Halloween season. What better way to present goodies than with these Halloween Treat Bag Toppers?


The sayings are so dang cute and my friends sure appreciated them :)
Visit Blooming Homestead to get these FREE PRINTABLES.  Print them, cut um out, fold in half, and staple.  Doesn't get much easier than that!


I'd love for you to follow along for the 31 Day Spooktacular! 

Catch up!

 Day 1 (Candy Corn Tablescape)
Day 2 (Costume Ideas)
Day 3 (GOURDgeous decor)
Day 4 (3 Ingredient Pumpkin Cookies)
Day 5 (FREE Halloween Printables)
Day 6 (Acorn Desserts)
Day 7 (Pumpkin Candle Holders)
Day 8 (Specimen Bottles with FREE Printables)
Day 9 (DIY Book Crafts)
Day 10 (7 Layer Dip- Halloween Style)
Day 11 (Skull Basket)
Day 12 (Fall Mantel- Guest Post)
Day 13 (Danger Sign)
Day 14 (Skeleton Centerpiece)
Day 15 (Vintage Cupcake Toppers)
Day 16 (DIY Halloween Goblets)
Day 17 (Snake Wreath)
Day 18 (Autopsy Display)
Day 19 (Spiderweb Pumpkin)
Day 20 (Mummy Wraps)
Day 21 (House Numbered Pumpkins)
Day 22 (Candy Corn Spoons)
Day 23 (Outdoor Halloween Tour)
Day 24 (Shrimp Brain Dip)
Day 25 (Bloody Shower Curtain)


You might find me linking up to...

Sunday, October 23, 2011

Day 25 of 31 Day Spooktacular- Bloody Shower Curtain

Disclaimer: Not for the faint of heart!


Is it just me, or does this shower set you give you the creeps?  A bit disturbing?  Taking it a little too far?  Weird in general?
Source
These are all the reasons why I HAD to make one for my Halloween party!

This set above goes for around $40 but you can make your own with red paint, a white shower curtain, and a white bath mat. 

Instead of spending $13+ on a white shower curtain, I made mine with a white shower curtain liner from the dollar store. Instead of buying an actual bathmat for $15 that I will have out for 2 weeks, I bought a table place mat for $3.  I set it over my white bath mat and it did the trick.  Here is my version..


I was going to only put one blood streak on the curtain, but do you know how hard it is to stop shoving your paint covered hands along it? 
  
Creepy? Yes.
Disturbing? Yes.
Taking it a little too far? Yes.
Perfect addition to a Halloween party? YES!

I can't wait for all of our Halloween guests to gasp when they use the bathroom :)


I'd love for you to follow along for the 31 Day Spooktacular! 

Catch up!

 Day 1 (Candy Corn Tablescape)
Day 2 (Costume Ideas)
Day 3 (GOURDgeous decor)
Day 4 (3 Ingredient Pumpkin Cookies)
Day 5 (FREE Halloween Printables)
Day 6 (Acorn Desserts)
Day 7 (Pumpkin Candle Holders)
Day 8 (Specimen Bottles with FREE Printables)
Day 9 (DIY Book Crafts)
Day 10 (7 Layer Dip- Halloween Style)
Day 11 (Skull Basket)
Day 12 (Fall Mantel- Guest Post)
Day 13 (Danger Sign)
Day 14 (Skeleton Centerpiece)
Day 15 (Vintage Cupcake Toppers)
Day 16 (DIY Halloween Goblets)
Day 17 (Snake Wreath)
Day 18 (Autopsy Display)
Day 19 (Spiderweb Pumpkin)
Day 20 (Mummy Wraps)
Day 21 (House Numbered Pumpkins)
Day 22 (Candy Corn Spoons)
Day 23 (Outdoor Halloween Tour)
Day 24 (Shrimp Brain Dip)


You might find me linking up to...

Wednesday, October 19, 2011

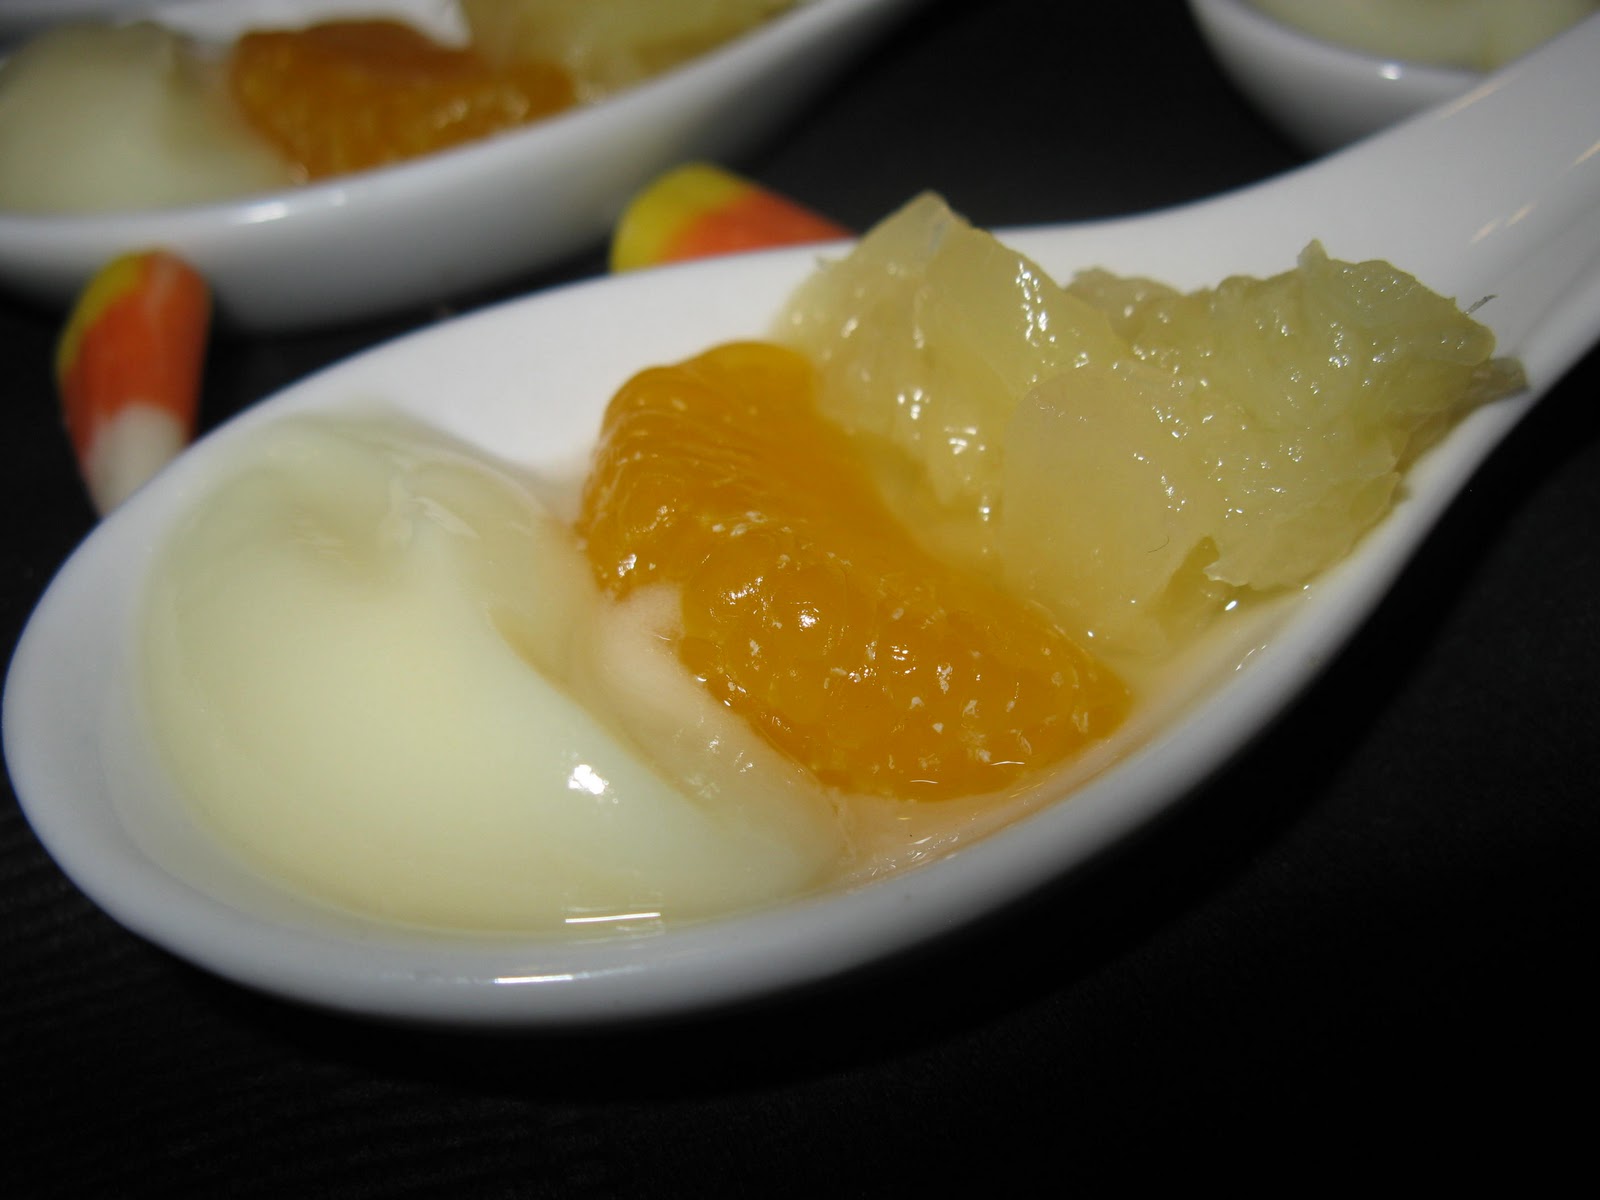
Day 22 of 31 Day Spooktacular- Candy Corn Spoons

How adorable are these candy corn appetizer spoons?


A little bit of yogurt or pudding, a mandarin orange, and a bit of drained crushed pineapple... I trust that you can figure it out for yourself :)


Don't worry, you don't need porcelain spoons. Plastic ones work just as good!


I'd love for you to follow along for the 31 Day Spooktacular! 

Catch up!

 Day 1 (Candy Corn Tablescape)
Day 2 (Costume Ideas)
Day 3 (GOURDgeous decor)
Day 4 (3 Ingredient Pumpkin Cookies)
Day 5 (FREE Halloween Printables)
Day 6 (Acorn Desserts)
Day 7 (Pumpkin Candle Holders)
Day 8 (Specimen Bottles with FREE Printables)
Day 9 (DIY Book Crafts)
Day 10 (7 Layer Dip- Halloween Style)
Day 11 (Skull Basket)
Day 12 (Fall Mantel- Guest Post)
Day 13 (Danger Sign)
Day 14 (Skeleton Centerpiece)
Day 15 (Vintage Cupcake Toppers)
Day 16 (DIY Halloween Goblets)
Day 17 (Snake Wreath)
Day 18 (Autopsy Display)
Day 19 (Spiderweb Pumpkin)
Day 20 (Mummy Wraps)
Day 21 (House Numbered Pumpkins)


You might find me linking up to...

Tuesday, October 18, 2011

Day 21 of 31 Day Spooktacular- Numbered Pumpkins

I'm guessing you have seen numbered pumpkins all over blogland and pinterest. A few artificial pumpkins, a can of spray paint, and one piece of heavy-duty wire later I came up with my own version.


I can't believe we are over 2/3 done with the Spooktacular series. Halloween will be here before we know it!  What are your plans?


I'd love for you to follow along for the 31 Day Spooktacular! 

Catch up!

 Day 1 (Candy Corn Tablescape)
Day 2 (Costume Ideas)
Day 3 (GOURDgeous decor)
Day 4 (3 Ingredient Pumpkin Cookies)
Day 5 (FREE Halloween Printables)
Day 6 (Acorn Desserts)
Day 7 (Pumpkin Candle Holders)
Day 8 (Specimen Bottles with FREE Printables)
Day 9 (DIY Book Crafts)
Day 10 (7 Layer Dip- Halloween Style)
Day 11 (Skull Basket)
Day 12 (Fall Mantel- Guest Post)
Day 13 (Danger Sign)
Day 14 (Skeleton Centerpiece)
Day 15 (Vintage Cupcake Toppers)
Day 16 (DIY Halloween Goblets)
Day 17 (Snake Wreath)
Day 18 (Autopsy Display)
Day 19 (Spiderweb Pumpkin)
Day 20 (Mummy Wraps)

You might find me linking up to...